|
retinify 0.1.7
Real-Time AI Stereo Vision Library
|
|
retinify 0.1.7
Real-Time AI Stereo Vision Library
|
Retinify is designed by clearly separating the stereo processing pipeline into three phases:
By separating initialization from per-frame execution, the runtime loop is kept minimal, enabling stable real-time processing on the GPU. This structure is shared across the Python, C++, and ROS2 APIs.
In C++, retinify::Pipeline handles these three phases.
The Initialize phase prepares all processing using information that is fixed before execution.
This phase is typically executed once at application startup. All data required for per-frame processing is prepared here, but no image processing is performed.
In C++, retinify::Pipeline.Initialize() corresponds to this phase.
The Execute phase performs all per-frame processing on the GPU.
This phase is called repeatedly inside the real-time loop. The CPU handles control flow only, while all image processing and computation are executed on the GPU.
In C++, retinify::Pipeline.Execute() corresponds to this phase.
The Retrieve phase transfers selected results from GPU to CPU.
All conversions are performed on the GPU before transfer to minimize data movement. Retrieve can be called selectively, depending on application requirements.
In C++, retinify::Pipeline.RetrieveDisparity(), retinify::Pipeline.RetrieveRectifiedImages(), etc. correspond to this phase.
Retinify uses the same coordinate system conventions as OpenCV.
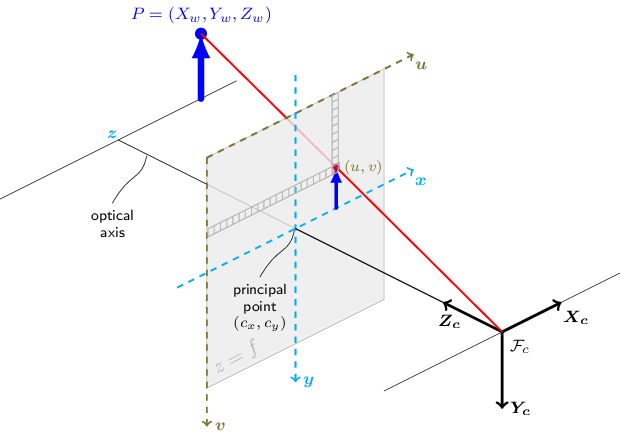
(Source: OpenCV Documentation, https://docs.opencv.org/4.x/)
There are three options for using retinify: